Up until last month, I was snapping most gaming screenshots with my phone and camera. They got me by, and even though some systems let you take screenshots natively — like the Vita, PC, or through the Wii U web browser — I needed a better solution. Ever try to take an action shot in a game when you have to think about pressing another key or button combo? Talk about inefficient and unnatural. Plus, if you have to pause a game to take a picture with a camera, most pause screen overlays make it impossible.
 So, after doing a considerable amount of research, my 40th birthday gift to myself was an Elgato Game Capture HD. I’d been considering a PlayStation 4 as well, but in the interest of improving the blog and creating richer media content, I decided on the smaller — and cheaper — piece of hardware.
I wrote last month about its packaging, contents, and first impressions here, but to quickly summarize, it’s all of high quality. The packaging feels premium, which is a welcome bonus in this day and age of cheap blister packs. The device itself is compact and light (smaller than a Roku and about the size of a Nintendo 64 cartridge), with clearly marked input and output ports, and non-slip rubber feet.
My favorite feature is that it requires no external power, which will save you from potentially having to free up an electrical outlet. I definitely appreciate this, since using this device requires at least 2 additional cables.
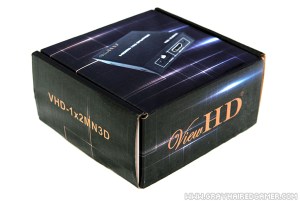
 If you plan on using this device with a console that has High-bandwidth Digital Content Protection (HDCP) — such as a PlayStation 3 — you will either have to use the clunky PlayStation cable that is included with the Game Capture HD, or purchase an inexpensive HDMI splitter like this one. While the PlayStation cable works, setting it up is tedious. I decided to go with the splitter, and I highly recommend that method. Keep in mind that the splitter is powered, so you will need an additional outlet plus one extra HDMI cable to go from the splitter to the Game Capture HD.
Setup beyond that is a snap. Simply plug in your input and output HDMI cables, and run the included USB cable from the Game Capture HD to your computer. No physical software is included, so just head to Elgato’s website, download, install, update your firmware if needed, and you’re done.
Elgato’s software is very easy to use, and it has yet to crash on me once. The Game Capture HD is automatically detected, and after making a few quick selections, you’re ready to start capturing video and taking screenshots. Since I’m using HDMI for all of my consoles, I leave it on the “PlayStation 4” profile setting.
The Game Capture HD supports many different resolutions, from 240i all the way up to 1080p. Old consoles require Elgato’s Analog Video Adapter (sold separately) or the Component Adapter, which is included. Since all of my old consoles are in storage, I have not tried capturing with non-HDMI sources yet, but I will update this review when I do.
One slight disappointment is that 1080p can only be recorded at a maximum of 30fps. If you want 60fps capture, you have to drop your output signal to a maximum of 720p. Captures done in 720p 60fps still look great though, and it’s my preferred way to go if I need video that most accurately represents the performance of 60fps source material, such as Mario Kart 8, Bayonetta, or Wipeout HD.
In terms of final output quality, I’m very pleased with the results! The following capture was taken at 1080p and uploaded to YouTube at 720p. I think it looks great and retains excellent overall image detail and smoothness:
To check out how crisp and smooth its 720p 60fps videos look like, Right-Click & Save this link: MKV (82MB).
Another thing to keep in mind is that because everything is hardware-encoded on the fly, there is a delay of about 2 seconds between what you see on your TV and what you see on your PC. Because of this, it’s nearly impossible to play games solely in the capture software’s window, which is unfortunate. Instead, you’ll want to have either a picture-in-picture or side-by-side setup so that you can play on one screen and monitor your capture on the other.
If you only have a single display without this functionality, you’ll want to get everything set up in the capture software prior to starting, and then use the software’s keyboard shortcuts to toggle recording.
GHG is currently on a limited 1Mbps upstream connection, so I was not able to test out the Game Capture HD’s live streaming capabilities. I will update this review when I am back on a sufficiently fast internet service.
For screenshots, I like using 1080p, but this brings up another small issue in that all videos are automatically H.264/MPEG-4 encoded. This inherently adds some compression artifacting and image degradation. This doesn’t matter as much for video, but if you need screenshots of the highest quality, this may not be the best device for you. They’re still good and totally usable, but they have a softer look that nitpickers like myself can’t help but notice.
I posted a few more sample screenshots here, and as you can see, certain content does fare better than others.
The Elgato software’s editing capabilities are OK, but they’re far from robust. I would recommend using a more fully featured editing program such as CyberLink PowerDirector to make things easier on yourself. In a pinch, however, the included editor will get the very basics done. It’s also easy to spit out screenshots from your videos, particularly if you don’t already have the excellent PC capture solution FRAPS.
For a street price of about $150, the Elgato Game Capture HD represents a great value for what is a very powerful and well-designed video recorder. It’s attractive, easy to configure, the software is stable and intuitive, and it will accept virtually any video format, old and new. Although it has some shortcomings in terms of raw image quality, the 1080p 30fps cap, and the encoder lag, it still comes highly recommended.


